Sunday, September 6, 2009
Saturday, September 5, 2009
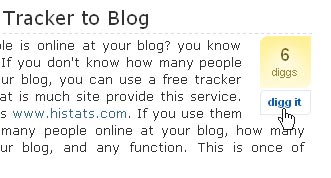
Add Digg Button to Blogger/Blogspot
ScreenShot:
 Follow the Steps below to add this cool widget to your blog. The main idea of this widget is to increase traffic to your blog.....
Just Add this cool widget and earn lots of traffic to your Blog...
Login To Blogger Go to Layout > Edit Html > Expand Widgets > Press Ctrl+F and find for below codes
<p><data:post.body/></p>
And replace them with below codes.
Note:-
If you dont find above code you find this one <data:post.body/> and replace it.
<p>
<!-- DIGG -->
<div style='float:left; margin-right:10px;'>
<script type='text/javascript'>
digg_url = '<data:post.url/>';
</script>
<script src='http://digg.com/tools/diggthis.js' type='text/javascript'/>
</div>
<data:post.body/>
</p>
Now Save Your Template. Enjoy More Traffic....
Friday, September 4, 2009
Earn in Blogger with AdBrite
One of the publisher network that allows you to earn money from blog is AdBrite. It also offers CPC adds like google provide.It pays 0.3$ per click on add But that only on each valid click by an visitor.
Sometimes Google adsense disaprove your application to join them because your site may be under construction.But instead of waiting them for start you can join adbrite and start earning as it will also trained you as an good experience as an add publisher which will help you a lot future using adsense network.
Adbite Provides:-
Text-Link adds like google pays 0.3$ for each valid click.Add banners also appears in these units.
Full page adds that appears after your site fix page impressions (i.e after your site 4 page impressions there full page add will appear). They pay for that adds on per 1000 impressions of there adds
Inline ads that appear as links on your text in your articles.These monetize your site very well.
Click the Image below to sign-up in AdBrite,
Thursday, September 3, 2009
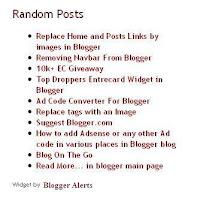
Random Posts Widget For Blogger

Random Posts Widget For Blogger shows different post links randomly every time your blog is reloaded.Really this widget get more page views for your blog posts.
To add this widget, Log onto:
Log into Blogger -> Layout -> Html/Javascript
Then paste the below code in it.
<span><script type="text/javascript">
var randarray = new Array();var l=0;var flag;
var numofpost=6;function randomposts(json){
var total = parseInt(json.feed.openSearch$totalResults.$t,10);
for(i=0;i < numofpost;){flag=0;randarray.length=numofpost;l=Math.floor(Math.random()*total);for(j in randarray){if(l==randarray[j]){ flag=1;}}
if(flag==0&&l!=0){randarray[i ]=l;}}document.write('<ul>');
for(n in randarray){ var p=randarray[n];var entry=json.feed.entry[p-1];
for(k=0; k < entry.link.length; k ){if(entry.link[k].rel=='alternate'){var item = "<li>" "<a href=" entry.link[k].href ">" entry.title.$t "</a> </li>";
document.write(item);}}
}document.write('</ul>');}
</script>
<script src="/feeds/posts/default?alt=json-in-script&start-index=1&max-results=1000&callback=randomposts" type="text/javascript"></script>
<a href="http://bloggeralerts.blogspot.com/2009/09/random-posts-widget-for-blogger.html">Get this Widget</a></span>
Note:
Before Saving the Html/Javascript,Find the below text in the above code and replace the number in that text to your desired number of random posts to be displayed.
numofpost=6
Now Save the Html/Javascript and see the widget in action in your Blog.
Recent Posts Widget for Blogger with Thumbnails,Summaries,Comments,etc

Display beautifully crafted links to Recent Posts on your blog with this widget. You can easily customize whether or not you would like to display thumbnails, post summaries, and the number of comments for each post along side the titles.
Features and Customization:
- The Recent Post Titles
- Display Post Thumbnails
- Choose which blog posts to display (choose URL).
- Display Post Summaries
- Length of Summaries
- Display Post Date
- Display Number of Comments on each post
- Display Read More Link
- Display separator between posts
- Number of Posts do Display
- Determine height
This widget is very simple to install. Just simply click the button below to choose which blog you would like to implement it on.
Credits: BloggerAlerts via BloggerPlugins
Wednesday, September 2, 2009
Top Commenter's Widget for Blogger/Blogspot
This widget will enable you to do exactly that! If you install this widget, a list of the top ten people who have commented most in your blog will be displayed with along with the count of comments they have made.
This is a great way of thanking readers who comment regularly and is very easy to add to your blog layout using the one click widget installer
To install this widget in your own blog, simply change the title to suit your preferences and alter the URL to match that of your blog.
If your blog has a Blog*Spot URL, you should enter your URL like this:
In either case, do not add the "http://" part! This is already rendered by the script used to display the commenter feed.
If you would like to remove your own name from the list, enter your name in the "Filter Your Name" box.
Use the form below to add this widget to your own Blogger powered blog:
This widget is based on the Top Commentators Widget for Blogger. It uses Yahoo Pipes to process the last 500 comments made on your blog, and displays a list of the ten people who have commented the most in this range.
Each name is linked to the most recent comment on your blog made by this person (since it would be very difficult to create a generic script which would work for all blogs and comment settings!).
Update: I have now added an extra element which allows you to remove your own name from the list of Top Commenters.
I have tested this extensively in IE6/7 and Firefox and in these browsers the script and display work just fine. If anyone notices a glitch or problem in other browsers, please let me know so I can work on solving the issue.
Credits: BloggerAlerts via BloggerBuster
Add AutoHiding Social Bookmarking Widget
Screen-Shot:
So have a look on this widget, designed by Eight7Teen
To add this widget to your blog, follow these instructions:
Step 1:
Log in to Blogger, go to Layout -> Edit HTML and mark the "Expand Widget Templates" box.
Step 2:
Now find (CTRL+F) this in the code:
</head>
And immediately BEFORE/ABOVE it, paste this code:
<!--HIDDEN-BOOKMARKS-STARTS-->
<style type='text/css'>
div.beauty-bookmarks {
height:54px;
background:url('http://i43.tinypic.com/2ueii3t.png') no-repeat left bottom;
position:relative;
width:540px;
}
div.beauty-bookmarks span.beauty-rightside {
width:17px;
height:54px;
background:url('http://i43.tinypic.com/2ueii3t.png') no-repeat right bottom;
position:absolute;
right:-17px;
}
div.beauty-bookmarks ul.socials {
margin:0 !important;
padding:0 !important;
position:absolute;
bottom:0;
left:10px;
}
div.beauty-bookmarks ul.socials li {
display:inline-block !important;
float:left !important;
list-style-type:none !important;
margin:0 !important;
height:29px !important;
width:48px !important;
cursor:pointer !important;
padding:0 !important;
}
div.beauty-bookmarks ul.socials a {
display:block !important;
width:48px !important;
height:29px !important;
font-size:0 !important;
color:transparent !important;
}
.beauty-furl, .beauty-furl:hover, .beauty-digg, .beauty-digg:hover, .beauty-reddit, .beauty-reddit:hover, .beauty-stumble, .beauty-stumble:hover, .beauty-delicious, .beauty-delicious:hover, .beauty-yahoo, .beauty-yahoo:hover, .beauty-blinklist, .beauty-blinklist:hover, .beauty-technorati, .beauty-technorati:hover, .beauty-facebook, .beauty-facebook:hover, .beauty-twitter, .beauty-twitter:hover, .beauty-myspace, .beauty-myspace:hover, .beauty-mixx, .beauty-mixx:hover, .beauty-script-style, .beauty-script-style:hover, .beauty-designfloat, .beauty-designfloat:hover, .beauty-syndicate, .beauty-syndicate:hover, .beauty-email, .beauty-email:hover {
background:url('http://i44.tinypic.com/1znbj83.png') no-repeat !important;
}
.beauty-furl {
background-position:-300px top !important;
}
.beauty-furl:hover {
background-position:-300px bottom !important;
}
.beauty-digg {
background-position:-500px top !important;
}
.beauty-digg:hover {
background-position:-500px bottom !important;
}
.beauty-reddit {
background-position:-100px top !important;
}
.beauty-reddit:hover {
background-position:-100px bottom !important;
}
.beauty-stumble {
background-position:-50px top !important;
}
.beauty-stumble:hover {
background-position:-50px bottom !important;
}
.beauty-delicious {
background-position:left top !important;
}
.beauty-delicious:hover {
background-position:left bottom !important;
}
.beauty-yahoo {
background-position:-650px top !important;
}
.beauty-yahoo:hover {
background-position:-650px bottom !important;
}
.beauty-blinklist {
background-position:-600px top !important;
}
.beauty-blinklist:hover {
background-position:-600px bottom !important;
}
.beauty-technorati {
background-position:-700px top !important;
}
.beauty-technorati:hover {
background-position:-700px bottom !important;
}
.beauty-myspace {
background-position:-200px top !important;
}
.beauty-myspace:hover {
background-position:-200px bottom !important;
}
.beauty-twitter {
background-position:-350px top !important;
}
.beauty-twitter:hover {
background-position:-350px bottom !important;
}
.beauty-facebook {
background-position:-450px top !important;
}
.beauty-facebook:hover {
background-position:-450px bottom !important;
}
.beauty-mixx {
background-position:-250px top !important;
}
.beauty-mixx:hover {
background-position:-250px bottom !important;
}
.beauty-script-style {
background-position:-400px top !important;
}
.beauty-script-style:hover {
background-position:-400px bottom !important;
}
.beauty-designfloat {
background-position:-550px top !important;
}
.beauty-designfloat:hover {
background-position:-550px bottom !important;
}
.beauty-syndicate {
background-position:-150px top !important;
}
.beauty-syndicate:hover {
background-position:-150px bottom !important;
}
.beauty-email {
background-position:-753px top !important;
}
.beauty-email:hover {
background-position:-753px bottom !important;
}
</style>
<!--HIDDEN-BOOKMARKS-STOPS-http://bloggeralerts.blogspot.com-->
Step 3:
Now find this in the code:
<data:post.body/>
And BELOW/AFTER that, paste this code:
<!-- Social Bookmarking Icons Start-->
<style type='text/css'>
.bookmark img { border: 0;
padding:0px;
}
.bookmark a:hover {
position: relative;
top: 1px;
left: 1px; }
</style>
<span class='bookmark'>
<table align='left' border='0' cellpadding='0' width='100%'>
<tr>
<td style='vertical-align:middle' valign='middle' width='30%'>
<div expr:id='"sbtxt" data:post.id'>Bookmark this post<a style="text-decoration:none;" href="http://www.bloggerplugis.org">:</a></div><script type='text/javascript'>showsbtext("sbtxt" "<data:post.id/>",0)</script>
</td>
<td>
<a rel="nofollow" expr:href='"http://ma.gnolia.com/bookmarklet/add?url=" data:post.url "&title=" data:post.title' expr:onmouseout='"javascript:showsbtext("sbtxt" data:post.id "",0);"' expr:onmouseover='"javascript:showsbtext("sbtxt" data:post.id "",6);"' target='_blank'><img alt='Ma.gnolia' border='0' src='http://files.bloggerplugins.org/icon_sb_mag.gif'/></a>
<a rel="nofollow" expr:href='"http://digg.com/submit?phase=3&url=" data:post.url' expr:onmouseout='"javascript:showsbtext("sbtxt" data:post.id "",0);"' expr:onmouseover='"javascript:showsbtext("sbtxt" data:post.id "",1);"' target='_blank'><img alt='DiggIt!' src='http://files.bloggerplugins.org/icon_sb_dig.gif'/></a> <a rel="nofollow" expr:href='"http://del.icio.us/post?url=" data:post.url "&title=" data:post.title' expr:onmouseout='"javascript:showsbtext("sbtxt" data:post.id "",0);"' expr:onmouseover='"javascript:showsbtext("sbtxt" data:post.id "",2);"' target='_blank'><img alt='Del.icio.us' src='http://files.bloggerplugins.org/icon_sb_del.gif'/></a> <a rel="nofollow" expr:href='"http://www.blinklist.com/index.php?Action=Blink/addblink.php&Description=&Url=" data:post.url "&Title=" data:post.title' expr:onmouseout='"javascript:showsbtext("sbtxt" data:post.id "",0);"' expr:onmouseover='"javascript:showsbtext("sbtxt" data:post.id "",3);"' target='_blank'><img alt='Blinklist' src='http://files.bloggerplugins.org/icon_sb_bli.gif'/></a> <a rel="nofollow" expr:href='"http://myweb2.search.yahoo.com/myresults/bookmarklet?u=" data:post.url "&=" data:post.title' expr:onmouseout='"javascript:showsbtext("sbtxt" data:post.id "",0);"' expr:onmouseover='"javascript:showsbtext("sbtxt" data:post.id "",4);"' target='_blank'><img alt='Yahoo' src='http://files.bloggerplugins.org/icon_sb_yah.gif'/></a> <a rel="nofollow" expr:href='"http://www.furl.net/storeIt.jsp?u=" data:post.url "&t=" data:post.title' expr:onmouseout='"javascript:showsbtext("sbtxt" data:post.id "",0);"' expr:onmouseover='"javascript:showsbtext("sbtxt" data:post.id "",8);"' target='_blank'><img alt='Furl' src='http://files.bloggerplugins.org/icon_sb_fur.gif'/></a> <a rel="nofollow" expr:href='"http://www.technorati.com/cosmos/search.html?url=" data:post.url' expr:onmouseout='"javascript:showsbtext("sbtxt" data:post.id "",0);"' expr:onmouseover='"javascript:showsbtext("sbtxt" data:post.id "",9);"' target='_blank'><img alt='Technorati' src='http://files.bloggerplugins.org/icon_sb_tec.gif'/></a> <a rel="nofollow" expr:href='"http://www.simpy.com/simpy/LinkAdd.do?href=" data:post.url "&title=" data:post.title' expr:onmouseout='"javascript:showsbtext("sbtxt" data:post.id "",0);"' expr:onmouseover='"javascript:showsbtext("sbtxt" data:post.id "",10);"' target='_blank'><img alt='Simpy' src='http://files.bloggerplugins.org/icon_sb_sim.gif'/></a> <a rel="nofollow" expr:href='"http://www.spurl.net/spurl.php?url=" data:post.url "&title=" data:post.title' expr:onmouseout='"javascript:showsbtext("sbtxt" data:post.id "",0);"' expr:onmouseover='"javascript:showsbtext("sbtxt" data:post.id "",11);"' target='_blank'><img alt='Spurl' src='http://files.bloggerplugins.org/icon_sb_spu.gif'/></a> <a rel="nofollow" expr:href='"http://reddit.com/submit?url=" data:post.url "&title=" data:post.title' expr:onmouseout='"javascript:showsbtext("sbtxt" data:post.id "",0);"' expr:onmouseover='"javascript:showsbtext("sbtxt" data:post.id "",17);"' target='_blank'><img alt='Reddit' src='http://files.bloggerplugins.org/icon_sb_red.gif'/></a> <a rel="nofollow" expr:href='"http://www.google.com/bookmarks/mark?op=add&bkmk=" data:post.url "&title=" data:post.title' expr:onmouseout='"javascript:showsbtext("sbtxt" data:post.id "",0);"' expr:onmouseover='"javascript:showsbtext("sbtxt" data:post.id "",19);"' target='_blank'><img alt='Google' src='http://files.bloggerplugins.org/icon_sb_goo.gif'/></a>
</td>
</tr>
</table><br/><br/>
<p align="right">
<a href="http://bloggeralerts.blogspot.com/2009/09/add-autohiding-social-bookmarking.html" target="_blank">Get This Widget</a>
</p>
</span>
<!-- Social Bookmarking Icons End-->
You may of course remove any button code, if you do not want to show it.
Now save the template.
That's it
Credits: BloggerAlerts via BloggerStop
Change Favicon in Blogger
Blogger supplies every blog with the standard orange "B" blogger favicon. Having your own unique favicon is a great way to give your blogger template both a distinct and explicit brand. These small 16X16 pixel images will most definitely help your blog stand out from the rest of the blogspot blogs.
What is a Favicon?
A favicon is a small 16X16 image located at the top of your browser in the url bar.
How to Change your Favicon:
1.First go to Layout >Edit HTML in your Blogger Dashboard.
2.Backup your existing template before making any changes!
3.Place the code below directly below the </head> tag in your template.
<link href="YOUR FAVICON LINK HERE" rel="icon">
4.Now save your template.
5.Once your template is saved view your blog and make sure to refresh the page and delete your cookies.
Creating your own Favicon:
- Replace the TEXT "YOUR FAVICON LINK HERE" with your own 16 pixel by 16 pixel image link hosted on the internet.
- You can host your own favicon blogger image at sites such as ImageShack; PhotoBucket; Flickr; etc.
- Check out this Favicon Generator Tool which allows you to upload an image and it will format it for you!
Simple Bookmark Widget for Blogger/Blogspot
But for small or developing blogs webpage load-time is important to get more visitors,
So here is a Simple Bookmark Widget with simple text and do not disturb your blog's loading time and also helps in increasing your blog traffic.
For Widget Demo Look at Our Blog Posts,
Go to dashboard -> layout -> Edit HTML and then "Expand Widget Templates".
Find the Line Below,
<data:post.body/>
Paste the below lines after the above code,
<!-- Social bookmarking Widget by bloggeralerts.blogspot.com-->
<b>Add Post To:
<a expr:href='"http://digg.com/submit?phase=2&url=" + data:post.url + "&title=" + data:post.title' target='_blank'>Digg</a> |
<a expr:href='"http://technorati.com/faves?add=" + data:post.url' target='_blank'>Technorati</a> |
<a expr:href='"http://del.icio.us/post?url=" + data:post.url + "&title=" + data:post.title' target='_blank'>del.icio.us</a> |
<a expr:href='"http://www.stumbleupon.com/submit?url=" + data:post.url + "&title=" + data:post.title' target='_blank'>Stumbleupon</a> |
<a href="http://www.alexa.com/data/details/traffic_details?url=http://www.bloggeralerts.blogspot.com">Blogger Alerts</a>
<a expr:href='"http://reddit.com/submit?url=" + data:post.url + "&title=" + data:post.title' target='_blank'>Reddit</a> |
<a expr:href='"http://www.blinklist.com/index.php?Action=Blink/addblink.php&Url=" + data:post.url + "&Title=" + data:post.title' target='_blank'>BlinkList</a></b>
<!-- Social bookmarking Widget by bloggeralerts.blogspot.com-->
Save the template and view blog in a window.


